A blog spot for recipe experiments, thrifty creativeness, awesome shopping deals, sewing adventures, vegetable gardening fun with vermicomposting, and becoming more self-reliant.
Thursday, July 19, 2012
An Adjustable Belt In No Time!
Part of my son's school uniform is a belt. In fact, he is required to have his shirt tucked in every day so the belt will be showing so there will be no cheating! LOL!
The uniform store had some belts but none that were adjustable. So what happens when he hits a growth spurt? I get to buy more belts?? I'm just too cheap for that...
I got the idea how to make an adjustable belt when I saw a dog collar that didn't have an opening, just a slide to adjust the size. So you just adjust the collar to put it on Fido, then make it smaller so that he can't get it off.
Insert light bulb turning on here.
I found all of my supplies from different Etsy sellers - 1 yard length of 1.25" wide cotton webbing here in this shop; military style belt buckles, matching end caps, rectangle loops, and three bar moveable sliders here in this shop. I first planned to sew the webbing, but I just happened to have my glue gun out so I thought, "hey, why not glue it?" Lazy, I know... but it works!
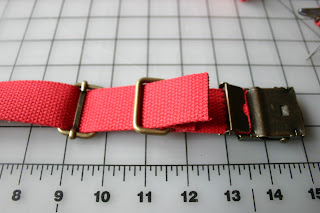
Step One - Cut 3 inches off of one end of your webbing and insert it into the part of the belt buckle that just clamps down and holds it in place. You may think like I did that this may not hold the webbing tight enough and that it could come undone but I pulled on it quite a bit and it stayed in place.
Step Two - Put the other end of the 3 inch piece of webbing in the rectangle loop. Put a thick line of hot glue on the end and fold it over. Hold it in place until it dries.
Step Three - Take the other piece of webbing and put the three bar slide on it so that the middle bar does not show.
Step Four - Turn it over so that the middle bar DOES show and slip the rectangle bar over the end (make sure that the buckle is up-side-down).
Step Five - Fold the end over and tuck it under the middle bar of the three bar slide. Pull enough through so that you can glue that end over the middle bar.
Step Six - Put a thick line of hot glue on the edge of the end and fold it over the middle bar.
Step Seven - Fold the end cap over the remaining raw edge of the cotton webbing and hammer in place.
Now you can adjust the belt as big or small as you need it to fit.
Cotton webbing comes in different widths and lots of different colors. I originally wanted to get a stripped pattern in red, khaki, and navy, but mine have to be plain. :-( School rules! Oh well, at least I won't have to buy my son any belts for a while.
Subscribe to:
Post Comments (Atom)


That is so smart! You are very handy when it comes to fabric. I'd have been tempted to whip out the duct tape. :-)
ReplyDeleteSomeone left a question on the reversible bag tutorial. I'm hoping maybe you can answer, since I'd probably make the same mistake she has.